Category: Landscape Design

  • Saying Goodbye

    Saying Goodbye

    Yesterday was a melancholy day at Land Designs Unlimited LLC. A client of 5 years is moving and yesterday was my last visit.

    There’s a chance the new owners will want my services, I hope they do. Unfortunately, experience has taught me it rarely works that way.

    This landscape is special for a couple of reasons. First, the owners are very nice and it’s a pleasure working for nice people. Second, I planted this landscape after the ‘correction’ of 2008 when the economy, and landscaping industry, was shaken to its core.

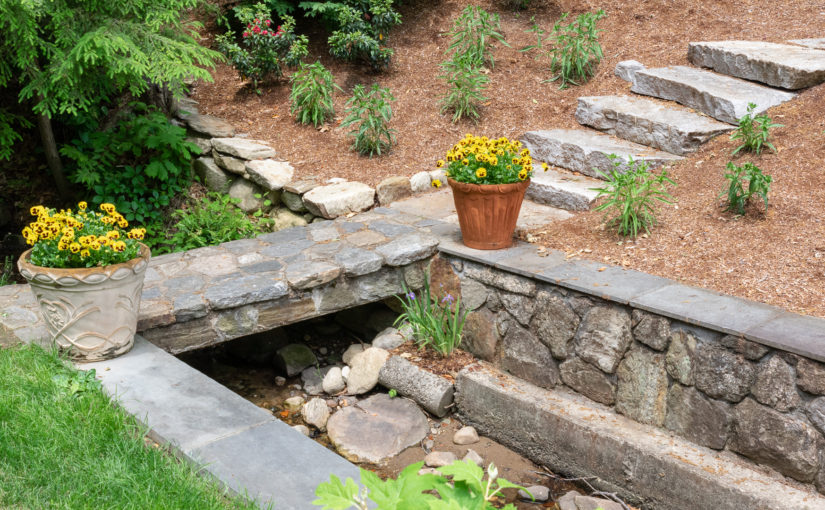
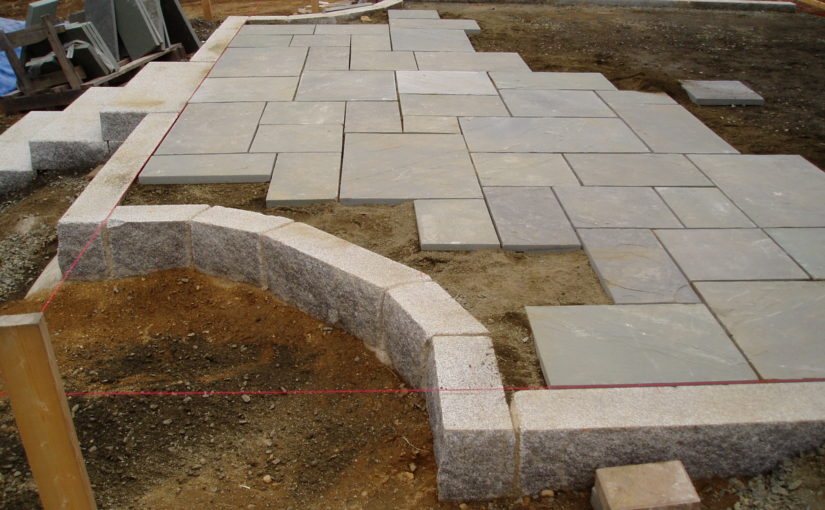
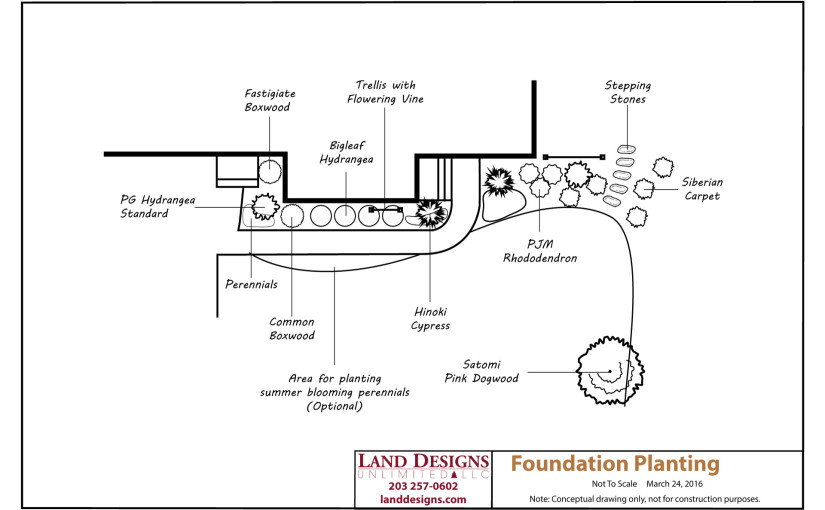
    When I first looked at the landscape I knew it was going to take a lot of work. The masonry investment was going to be equal to, if not more than, planting.

    Colonial Foundation Planting Before

    The landscape would never look right with a bandaid. A stone wall and new sidewalk had to be installed.

    Colonial Foundation Planting

    They were meeting another well-established company that worked with any budget, even if the job required a larger investment. Did I mention this was after the ‘correction’ of 2008?

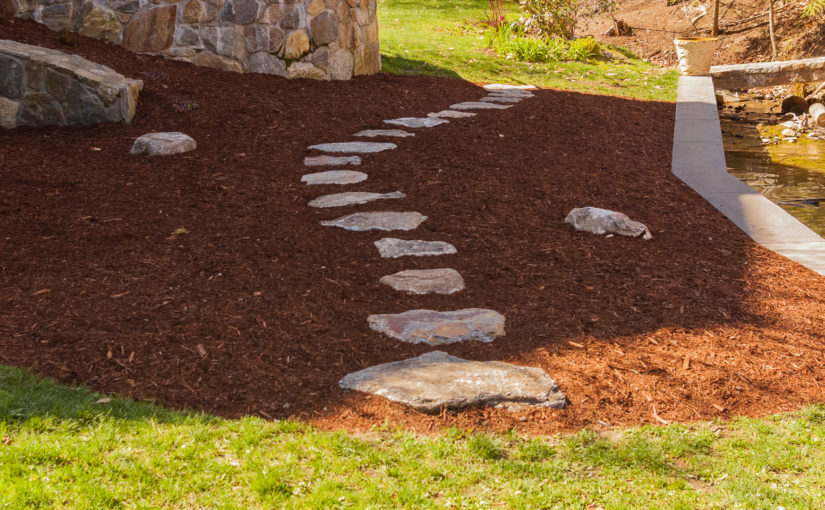
    I suppose the other company was more client-focused for I politely insisted the landscape be done my way. There was no way I was installing a landscape without a retaining wall to hold back the grade.

    Siberian Carpet (Microbiota decussata) Weeping Over Sidewalk

    I explained my design concept and assumed I’d never hear back. I reassured myself that I was polite, I spoke from the heart and I wasn’t going to be responsible for a shoddy landscape.

    The project came together superbly with a few hitches. The wire from their lamp post twisted around my tiller, a first, and I used more soil than anticipated which happens often. Also, the redbud planted on the left corner of the house didn’t pull through a bitter winter.

    Entryway Planting

    After installation, I visited four to six times a year to maintain the landscape, not too much, but enough to make a difference.

    Every spring there would be an edging, weeding and light pruning with fresh mulch every two to three years. I returned in June or July to hand prune and keep up with weeds over the summer.

    Plants Weeping over Sidewalk

    Some visits took only an hour; just enough time to pull the weeds, prune stray branches and re-edge the gardens with a weedwhacker.

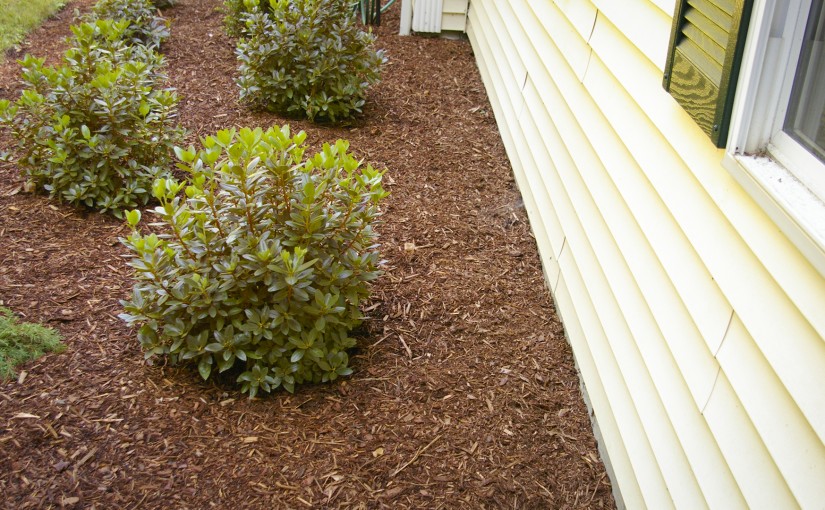
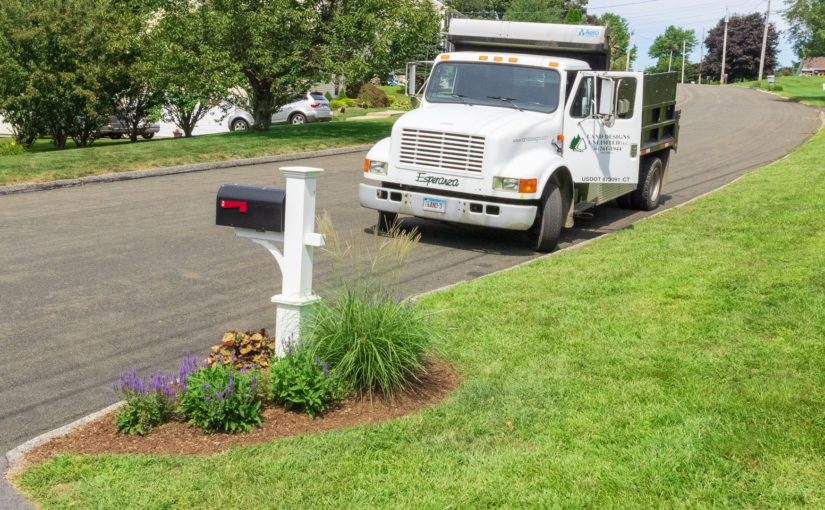
    The shrubs in this foundation planting have NEVER been touched by hedge clippers. I’ve only used my Felcos to prune. I hope you can see how natural the shrubs look.

    Being a landscape contractor is an endless cycle of finding new clients and losing old to promotions, retirement or being a poor fit.

    I look forward to showing you the landscape I’ve been working on the last few weeks where I find a balance between color and low maintenance.

    Ranch Foundation Planting In Progress

    It’s time to say goodbye to great clients and a beautiful landscape. I’ll miss you both.

  • Small Details Make a Big Difference

    Small Details Make a Big Difference

    I installed the landscape above last fall. It’s along a lake and required plenty of natives to work with the habitat and regulations.

    Blue Flag Iris – Iris Versicolor

    While designing the landscape I noticed Jewel Weed growing next to a footbridge. I wondered if I could do better with a more colorful plant. As I poured over native plant lists I stumbled on Blue Flag Iris (Iris versicolor).

    Blue Flag Iris tolerates shallow standing water and has purplish-blue flowers in early-June here in Zone 6a.

    Blue Flag Iris - Iris versicolor

    But this post isn’t about the merits of Blue Flag Iris. It’s about what a cool spot that was for Blue Flag Iris.

    Small Details Make a Big Difference

    I get a thrill out of small details like the grouping of Blue Flag Iris. These are the details that make or break a landscape. Placing a boulder in the right spot, staggering bloom times, smooth flowing edges, a place to sit and enjoy the landscape.

    Lately, I’ve been planting groups of perennials with one outlier, so it looks like the perennials are spreading into the landscape.

    One of my favorite details of this landscape is a Rat Snake living along the stream bed. I’ve stumbled on it sunning in the water twice this season. I hope to get a picture of it before the end of the year.

    All of these details, while seemingly small, add up to an exciting and cozy landscape.

  • Do The Right Thing

    Do The Right Thing

    It’s 8:30 at night on Labor Day as I write this post.  I just got off the phone with a prospective client who needed some masonry work done to get the CO for their new deck.

    After asking questions about the job it became clear what they needed more than a landscape designer was a mason.  I assured them that when the time came for grading around the deck or designing the gardens I would be glad to assist.

    I recommended they call a local company for the masonry work or visit Southbury Stone and Supply for materials and to get references for masons.

    Some contractors would subcontract the job or make something up on the fly.  I’ve reached the point in life where I know what I do well, and profitably, and what I don’t.  I enjoy masonry work but my detailed mind can’t get the work done quickly enough and frankly its heavy work.

    I don’t know if I did the right thing or not but I listened to my gut.  If I’ve learned one thing in life it’s to always listen to your gut.

    I hope I get a call to design and install some landscaping work around the new deck.  It sounds gorgeous.


    *Note:  The featured image is a patio I installed in the late 90’s.  I cut granite slabs to make the rounded corners and used flamed bluestone for the patio.  The granite slabs I used for the steps had a ‘cushion edge’ to give them a weathered look.

    My clients hired masons to build steps to their new french door.  When the mason stepped on the patio he looked at me and said, “Do you think you’re working with wood?”  That’s one of my favorite projects.

  • Common Witch Hazel – Late Fall Bloom

    Common Witch Hazel – Late Fall Bloom

    Common Witch Hazel (Hamamelis virginiana) is an underappreciated small tree.  It blends into the background most of the year until late Fall when in bloom.  How many other trees are in bloom in early December?

    Common Witch Hazel Flower Closeup - Hamamelis virginiana
    A closeup of Common Witch Hazel blooms. I took this picture on a cold and wet December morning with sleet on the ground from the previous night’s storm.

    Where to Plant Common Witch Hazel

    Don’t use Common Witch Hazel in your foundation planting.  It’s informal habit won’t work with modern homes.  If you live in a rustic log cabin nestled in the woods I say, “Go for it!”

    Plant this large shrub on the edge of the woods where it can blend in most of the year and give late Fall interest.

    Common Witch Hazel Tree - Hamamelis virginiana
    I planted my Common Witch Hazel at the back of my shrub border. You don’t notice it until late November to early December.

    For more information visit the Missouri Botanical Garden website.

  • How to Create a Curved Stepping Stone Path

    How to Create a Curved Stepping Stone Path

    This week I finished installing a stepping stone path.

    This stepping stone path is unique for a couple of reasons.

    First, it provides a much-needed way to move through the garden.  There’s no way to cross the garden without it.

    Second, the stepping stone path gently curves to add interest.  The path curves left to make room for a future PG Hydrangea on the right.

    I’m looking forward to filming the garden when completed.

    How to create a Curved Stepping Stone Path

    Landscape Before work Begins
    When I started there was no way to get through the bed.  The plants were randomly planted with no sense of purpose.

    Laying out the Stepping Stone Path
    The white line is where the stepping stone path will be.

    Stepping Stone Path Completed
    It took me a day to select, deliver and roughly place the stepping stones.  It took a day and a half to install them. The work usually goes faster.  I chose some odd-shaped and large stones. I’m very pleased with the results.

    Laying out Stepping Stone Path
    Placing the stones is a two-step process.  First I roughly place the stones.  Next I put an X in the middle with a grease crayon and space them 26.5″ on center. The first and last stone go 13.25″ from the edge of the bed. The beginning and end never work out perfectly. I spread the difference between the last few.

    Completed Stepping Stone Path
    Set stepping stones 2-3″ high so they aren’t covered by mulch.  Nothing is more annoying than covering your freshly placed stepping stones.

    View of the Lake and Stepping Stone Path
    I’ve been working on a lake the last couple weeks and enjoying some incredible views.  The mulch in this bed is pure Hemlock Bark.  My favorite.

    A while back I filmed how I install stepping stones.  While I’ve gotten better at producing videos the way I lay stepping stones hasn’t changed a bit.

  • Foundation Planting Landscape Design

    Foundation Planting Landscape Design

    This morning I completed a foundation planting landscape design.

    What are my clients goals for the landscape?

    The number one goal is color.  Women want colorful and inviting homes.  Men want what their wives want as long as it stays within budget.

    The second goal is low maintenance requirements.  No one wants a landscape that needs constant attention.

    Some prospective clients focus on low price.  In some cases lower than I recommend.

    All I can say is, “You get what you pay for.”

    Restaurants that ask what type of wine you’d like with your meal cost more than the restaurants that ask, “Do you want fries with that?”

    See the video playlist Go To Plants for Your Landscape for more information.

    Foundation Planting Landscape Design

    I’m looking forward to presenting this foundation planting landscape design Saturday.

  • Prune Lawn Trees High

    Prune Lawn Trees High

    I just returned from an evening walk with Theo and my forehead burns from a fresh scratch.

    Theo walked around a tree four feet from the road.  As I went around the back a branch caught me 3 inches above the eyes.

    I did have a flashlight.  I was looking at the ground for footing and suddenly smack!

    This is a great example of why it’s so important to prune lawn trees above people’s heads.  Assume folks will be walking in the dark and can’t see where they’re going.

    People driving down the street or your driveway also appreciate not having their cars scratched.

    A final friendly tip.  Don’t leave stubs on a tree, especially at eye height, where someone can lose an eye.

    Theo the Great Pyrenees Mix Pupply
    Theo our Great Pyrenees mix puppy.  He’s 90 lbs at just over a year old.  What a sweetheart.  He loves people, dogs, cats and creatures of all shapes and sizes.


  • How Close to House to Plant Shrubs

    How Close to House to Plant Shrubs

    The short answer.  As far as possible.

    Plants are constantly growing taller and spreading wider.

    When planting small to medium shrubs my goal is 1-2 feet of air between the edge of a shrub and the home.  Not just when I plant.  For the life of the landscape.

    You can prune the back of a shrub, where no one sees, as often as needed to keep the gap.

    If there isn’t a gap you’re in trouble.

    Shrub too Close to House
    I saw this Rhododendron slammed against the house this Spring.  It motivated me to write this post.

    Shrub planted too close to house
    This Rhododendron is an extreme example of planting too close.

    Medium shrubs like Rhododendrons, Azaleas, Spirea, Holly and Boxwood go  2.5-3′ from the side of the house.

    I can easily walk behind the shrubs after planting.

    Rhododendron Planted Next to House
    This rhododendron has a 2′ gap between the foliage and the side of the house.

    Large shrubs and small trees like Viburnum, Dogwood and Stewartia go a minimum of 6′ from the edge of the house and preferably 8′.

    Viburnum Planted Next to House
    This Viburnum is 8′ from the house. Imagine the pruning nightmare if it was 3-4′ away.

    When in doubt plant farther from the house.  You’ll never regret it.


  • Use Curves When Designing Landscapes

    Use Curves When Designing Landscapes

    Straight lines get you from point a to b.  Curves add interest.